|
Some friends of mine have been asking me gardening questions and I think they are worth sharing:
Q) I've planted seeds and I realize I don't really know the difference between weeds and sprouts. Any ID tips or weeding tips? A) It depends what you've planted. Typically anything that comes up looking like a grass is a weed, unless you've planted corn, which comes up looking like thick grass, or dill, parsnips or carrots, which come up looking like the daintiest little grasses. You could look up images of the things you've planted and pull anything that isn't them. You can also just let the sprout develop for a little while to determine if it's a weed or not. Start observing the plants in your garden and compare them with plants you see when you are out for walks. Common weeds are usually prevalent in other places in your area. My friend also mentioned a solution to his own problem, which is planting in rows. Q) I've waited the 6-10 days required for beans, and only one has popped up. Should I replant? A) Probably. Animals could take the sprouted seeds (a chipmunk had taken his) or it could be a watering issue. Seeds need the soil surface to be constantly moist, which could mean watering daily or even twice a day. Once the plant is growing, you can reduce watering. Watering technique is important. For seeds, you keep the soil surface moist, but no mature plant in the world benefits from a light watering every day. This makes the roots grow close to the surface (that's where the water you’re giving them is, after all) and therefore they are less drought tolerant. You want to water deeply and infrequently, so that roots stretch downwards searching for water, anchoring the plant and making it more drought tolerant. Most vegetables (and newly planted perennials and trees) like an inch of water per week. Rainfall usually provides this, but supplemental watering may be needed. Also, a note on animals. Boy, they love to eat sprouted seeds. I covered an area I seeded with row cover, which I hope will work. You can also cover your whole garden with rowcover. That is what I'm having some friends in Hartford do whose garden was getting raided by squirrels. Row cover can be ordered from Johnny Seed Catalog, Fedco seeds, or gotten at Natureworks in North Branford. Ok, and one more note. This one's on beans. I planted some pole beans that I was very excited about. They were getting eaten big time by insects. It's insect damage because they're missing very tiny pieces of leaf. Animals would just chomp large parts off. SO my solution was to plant more beans of different varieties. I figure more plants will spread out the damage more. It has worked, and my precious beans are growing! Q) How far apart do I plant vegetables? A) Seed packets will usually tell you a spacing. For most seedlings, I stretch my fingers as wide as they will go and plant them as far apart as my thumb and pinkie. Lots of people plant tomatoes too close. I give mine lots of room to grow--I plant mine about three feet apart. I also plant them very deeply. Tomatoes grow roots along their stems, so you should always plant them deeper than they were in the pot. This way they grow extra roots and they don't have to expend energy holding themselves up. Q) When do I plant vegetables? A) Cold-hardy things like greens (kale, collards, broccoli) can be planted approximately April 15th-August 1st. The end of that time span gets a little tight for planting seed, so you'd probably want to transplant. Tomatoes go in May 15th-June 15th. You'll want an early-maturing variety if you plant toward the end of that time span. Beans and squash can be seeded or transplanted May 15th-July 15th. There are better resources out there than this simple answer, but those are some guidelines. I know many people are gardening for the first time, or trying it again after a long break. Be patient. Some of your vegetables will get eaten by bugs and animals. Remind yourself that you can always go to the grocery store and they can't. Some of your crops will turn out horribly and others will be amazing. Neither outcome has anything to do with you, really.
1 Comment
On Sunday, when Adam and I found out that people were protesting in New Haven for police reform, we didn't really think twice about going, pandemic or no. We joined a crowd at the police station. There were informal speeches for a while, then there was commotion, and someone on the bullhorn asked white people to go to the front. In our current system, which needs to change, White people face less risk of injury, arrest, and death from the police, so a line of them blocking the Black protesters provides some safety.
I found myself linking arms with strangers as we pushed towards a line of police. In a moment I can't forget, the officers before me reached for the heavy weapons on their belts. The metallic taste of fear filled my mouth. I really did not want to get shot or beaten that day, but there was no question in my mind that I was in the right place, doing the right thing. I felt the symbolic weight of what I was doing; physically embodying a commitment to be uncomfortable in order to defend the lives of others. When the crowd eventually pushed back and the police relaxed, I looked around me. I was definitely on the older side of the protesters, and I wondered if I looked like a frumpy lady from the suburbs in a sunhat. Probably. But that didn't matter. In fact--good. That's who should be at these protests. White people of every demographic must be visible in their demand that police violence must stop. In fact, I will go so far as to recommend that White people actively put themselves in the position to be harmed in defense of Black people. It is hard for White people to comprehend fearing our society; fear is not written on our skin, in our histories. Putting ourselves in positions to feel that fear unlocks an empathy that I think will transform our society. The fear is not written in our skin, but we can write it in our memories, in our feelings. And then take steps to abolish it forever. While I’ve always been fascinated with mushrooms, I’ve always erred completely on the side of caution, until a few chances to go mushroom hunting with some seasoned experts changed all that. The way they hide under detritus on the forest floor, sometimes growing directly out of leaves, pine needles, and pine cones is personally a source of delight. They can also be cultivated outdoors, in your yard, increasing the quality of your soil as well as creating new soil, and adding a source of food and compost for you and everything in your garden. Part of our goal in loading a huge amount of fresh wood chip into our yard was for the sake of attracting mycelium, the extraordinarily dense and complex subterranean life form of which mushrooms as we know them are a fruiting body. Mycelium looks like a white, cobweb-like substance, and you’ll often see it naturally forming on the underside of dead leaves or fallen branches in the forest. Many mushrooms ‘digest’ fallen biomass like this, in turn becoming food for insects as they start to rot. In their lifecycle, mushrooms help contribute to the creation of a huge amount of fresh soil. Mycelium has also been positively implicated in the life-cycle of nearby bees, as the sweet smell that many of us think of as a ‘mushroomy’ aroma attracts bees and other insects to this food source. One study demonstrated that bee colonies fed mycelium extract showed significant resistance to deformed wing virus, Lake Sinai virus, and other diseases affecting bee populations. The wood chip has been incorporated into "hugelkultur" mounds, in paths, and as general mulch, and just about everywhere it makes contact with the ground, it is alive with white strand, sometimes forming solid chunks of woodchips. We've seen three different species of wild mushrooms in our yard as a result. You don't have to make it a crapshoot, however, as to what kind of mushrooms you are producing. Indoor mushroom cultivation is known for being at least a little fussy, requiring a high degree of sanitation and sterilization if you’re going to any degree beyond the small tabletop kits of gourmet oyster or shiitake mushrooms you can purchase from various companies. But outdoors, using cardboard, FRESH wood chips and straw and some mushroom spawn from a company like Field and Forest in Wisconsin, you can set up a bed in a shaded area to grow Winecap or Oyster mushrooms on beds. This is our first attempt at doing such a thing, but from what I’ve been reading this method produces delicious edible mushrooms several times a year depending on your climate, using water and the wood chip bed for food. Because mushrooms (the fruits) are something like 90% water, you’ll want the bed to be in a shaded area. WHAT YOU NEED
We set up these beds based on a vague synthesis of techniques from Tradd Cotter’s “Organic Mushroom Farming and Mycoremediation” book, as well as the video from FreshCap Mushrooms in western Canada, on building a straw bed for oyster mushrooms. Tradd Cotter’s technique specifically talks about the Winecap Stropharia mushroom, but later in his book identifies Oysters as a prime candidate for growing outdoors in a garden on fresh wood chips. Tony from FreshCap describes setting up a bed specifically with gray Oyster grain spawn, fresh straw, and a little polypropylene sheeting. I felt as though I had to adapt a little given our current situation (and given one other experiment we tried), so our method straddles the two. If you're looking for other info, just remember the basic terms - Media/Substrate and Spawn. 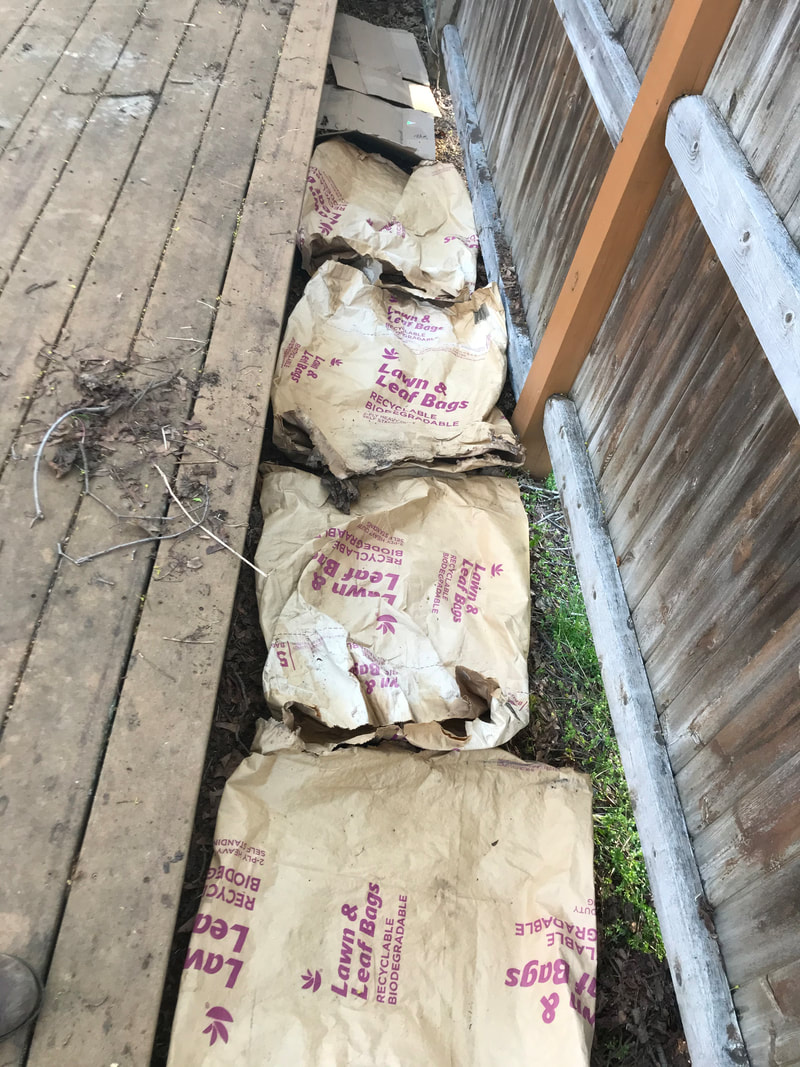 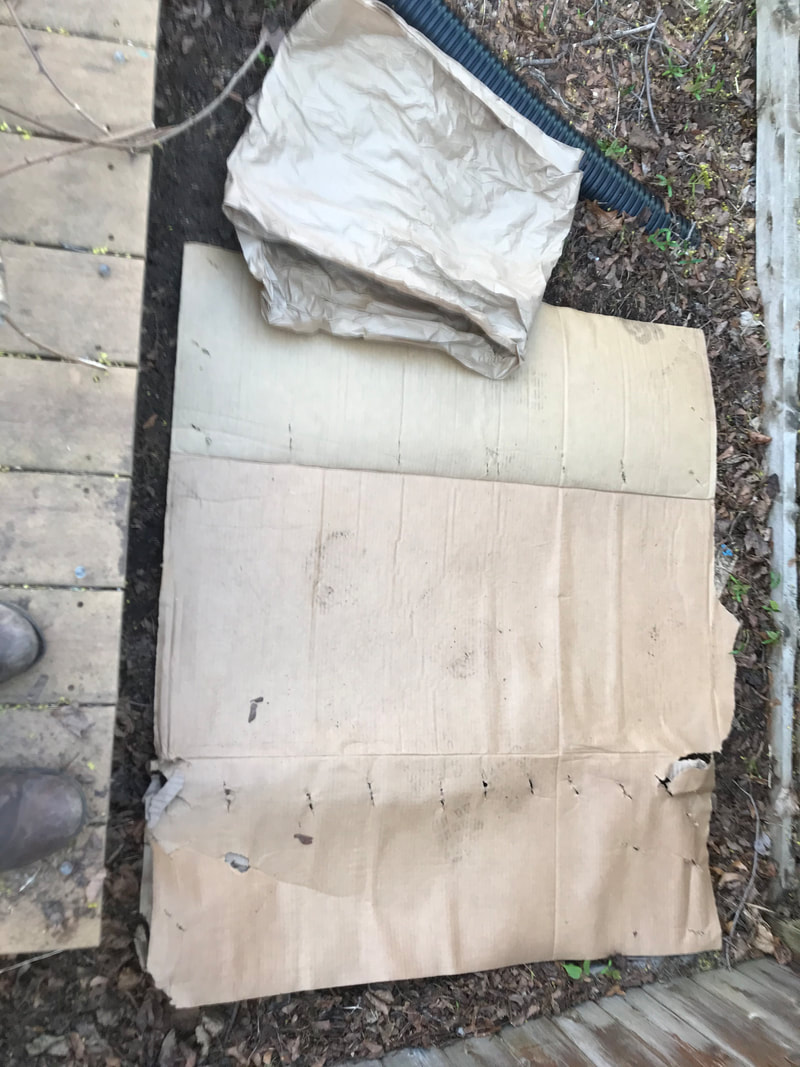 Between our deck and the old yard fence, there is a shady patch and kind of a long trench, both collecting a lot of detritus that has been steadily breaking down. These seemed like good places to try Oyster beds, given the conditions. We started by laying cardboard down. This is in part to prevent other competitor fungi from taking over the wood chips, and also to prevent weeds from growing up through the pile, which they certainly will do without a buffer. (Toward the front of the first photo, it’s old biodegradable leaf bags. These MAY be a gamble because they’ve started to rot a bit - but no visible mycelium on them). 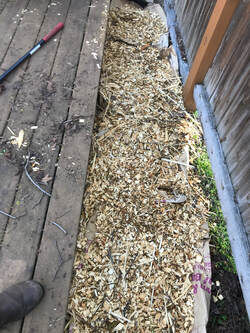 Then sprinkled on a thin layer of mushroom grain spawn. On the long trench, it’s pink oyster grain spawn, a warm-weather variety, and in the rectangular patch, it’s Blue Dove, a trademarked variety from Field and Forest. On top of that, we put a layer of fresh wood chips about 2 inches thick, then some straw, then more grain spawn. We built it up like like a layer cake - with a thin layer of spawn on the bottom, and fresh wood chips and straw on top. For the trench, I used a 4 lb bag of grain spawn in total, and for the rectangular patch, about half of a 4lb bag of grain spawn. There are formulas and ratios that you can follow, but if you don’t know exactly the volume of wood chips you are working with, you may just have to eyeball it. Theoretically, more spawn means higher likelihood of success. It is worthwhile to pick a variety based on the temperature - it may have been too cold at night still to start a pink oyster bed, and those are still going a bit slowly. 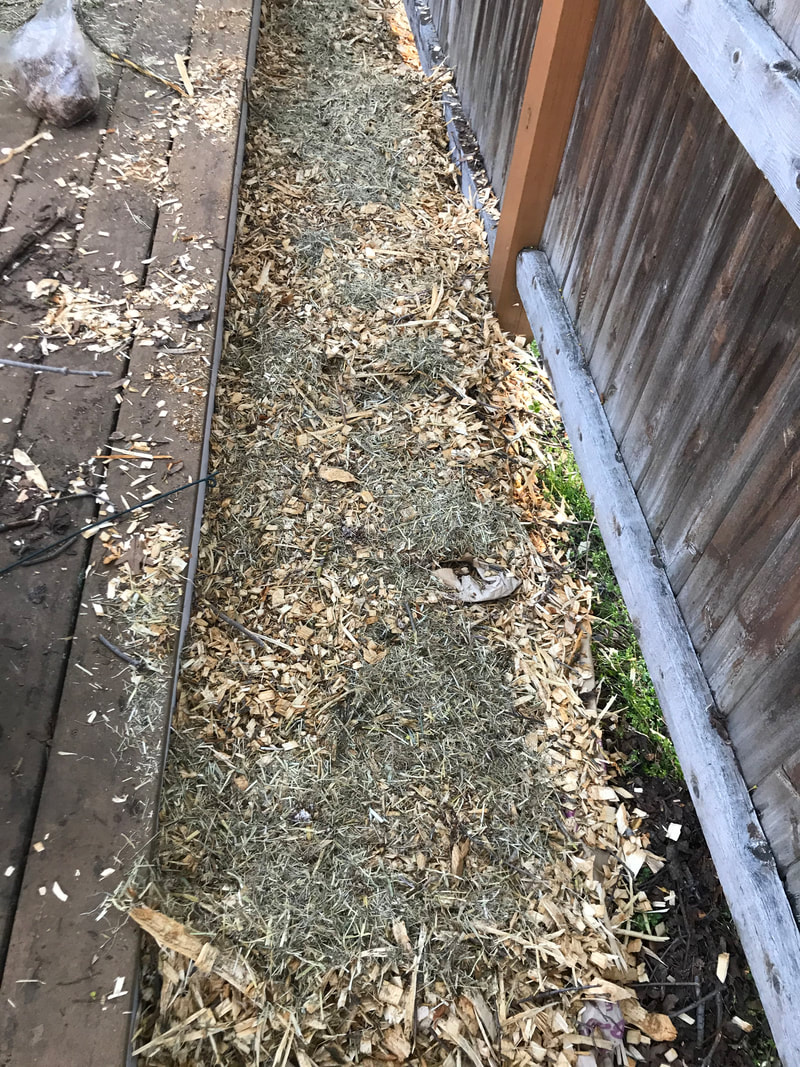 What will success look like? This is called colonization - when the mycelium as a whole takes over a majority of the body of wood chips you’ve set up for it. (Pictured is a bunch of wood chips elsewhere in the yard, colonized with...something else to be determined.)  Interspersing grain spawn among wood chips in this way increases the likelihood that the whole pile will be colonized by the oyster mushrooms we’ve “planted”, as opposed to something else. I plan to water it daily for the first 1-2 weeks, keeping it covered with either a tarp or cardboard - then once weekly for the following month, and finally once monthly. Both wood chips and mycelium retain water quite well, so once these beds are established they will need very little watering for sustenance, unless there’s a dry spell. Oyster mushrooms are fast colonizers, so some folks I’ve spoken to with experience in this style of cultivation have suggested fruiting might happen as early as one month from now if conditions are right. In the Grey Dove bed, I'm seeing mycelium bursting forth from the surface, and I'm hoping to have an update on that soon. 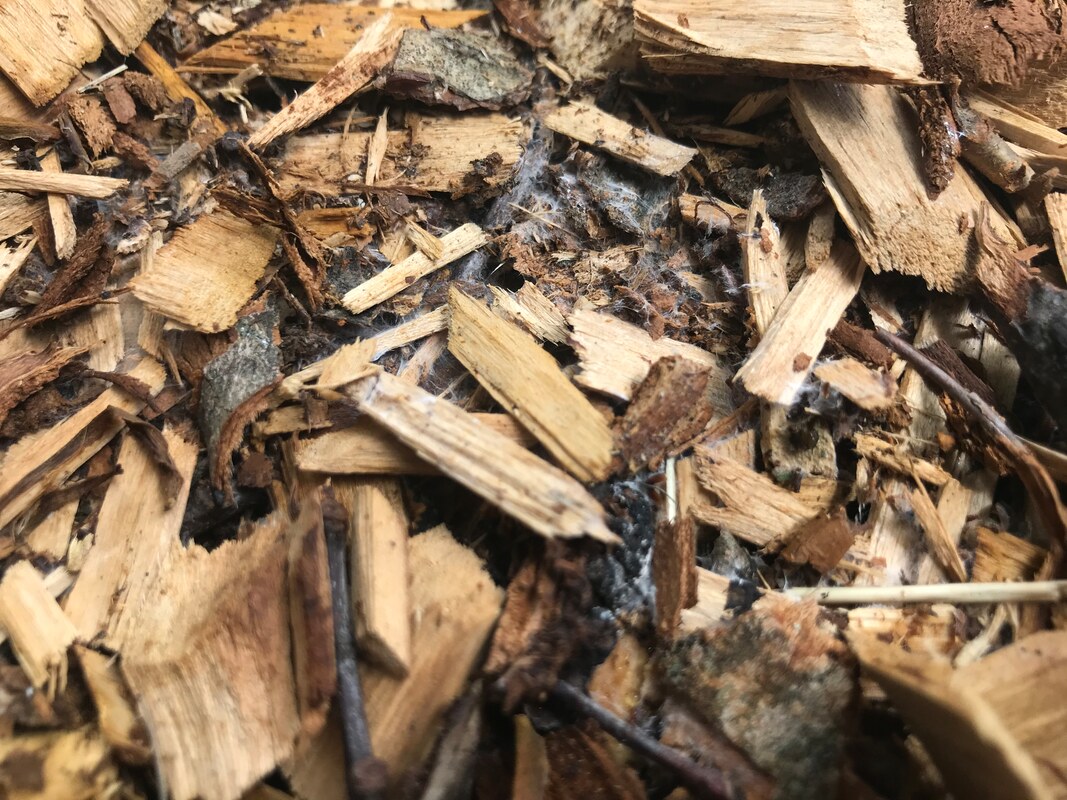  I plan to set up two beds with Winecap Stropharia spawn, which is a mushroom that is slower to colonize, but where beds are known to produce for up to 3 years. Both varieties give you the benefit of choice edible mushrooms that are documented as both safe and delicious, while helping to give you several inches of fresh soil per year. I’ve seen documentation of Stropharia patches set up amongst existing garden beds, with holes cut in cardboard for significant patches of flowers or trees. I’ve even seen setups where the beds are built with fresh wood chips but topped with finished garden mulch, if you are concerned about the appearance to the street or sidewalk. Note - if you are looking for fresh woodchips, many local arborists or tree services are more than happy to get rid of a load of freshly chipped or cut wood, at no cost to you. There’s also a service called Chip Drop which will automatically connect you to an arborist with no phone-call required. The potential downside of this is that you don’t control the amount of material you’re getting - an average small landscaping truck carries about 4 cubic yards of biomass, which takes up the ground space of a mid-sized SUV in your driveway or on your lawn as you get ready to use it - and you can end up with more! There are plenty of uses for fresh woodchips, including as mulch, in piles to attract mycelium, as part of hugelkultur (buried wood) beds - see a forthcoming guest-post. You can also use them as kindling, or coordinate with your neighbors if you have fellow gardeners or permaculture enthusiasts in your area. Second note - It is not advised to eat mushrooms that have grown in areas treated with pesticides or contaminated with heavy metals, as mushrooms are able to leach incredible amounts of contaminants from the soil. Building a raised bed may mitigate that somewhat, but given how many nutrients mushrooms draw up from the surroundings, I would advise against it. But mushrooms also demonstrate promising potential in bio-remediation, the use of particular plant, animal and fungi species specifically targeted to help recover a wounded or contaminated ecosystem. If you are trying to restore a yard that has been chemically treated over the long term, I suspect that the cultivation and encouragement of mushroom growth would only aid that restoration, providing a significant link in the food web to species at so many levels of an ecosystem. I've been ruminating on perennial food plants for the past few days. I'm in charge of planting the vegetable garden at Natureworks, and guess what? I haven't done it this year. I haven't been there much, and when I am there, I don't have time. But it looks ok. That's because the rhubarb, strawberries, raspberries, and herbs that come up year after year. Perennial food plants. Sure, there are gaps where annual vegetables would usually go, but the garden looks ok and we get some harvest without doing anything.
And that's the key. Will your food plants come up without you doing anything? What if your main gardener gets hurt, or is too busy, or your annual vegetable seedlings die for some reason? You won't have vegetables. But if you base your garden around things that you plant once and will produce for years, you can be guaranteed to have some food. Perennial vegetables are built for resilience. Diverse perennial vegetables are build for extra resilience because if one of them has a bad year, the others will feed you. Just a few perennial vegetables off the top of my head: Asparagus Rhubarb Good King Henry (it's a leafy green) Turkish Rocket (another leafy green. It might reseed and become invasive? I'm not sure about this one) Many herbs Fruit trees and berry bushes Nut trees Some varieties of kale and collards will overwinter in New Haven without protection and in colder climes with row cover or plastic on them. They are excellent spring greens. Later in spring they flower and go to seed, so you attract bees and then get more seed. Cilantro and dill are not exactly perennial, but if you scatter their seeds in the fall, they will come back next year. So, though I often get dreamy about tomato varieties, this year is reminding me how important it is to focus on food plants that will come back year after year. Don't do it! Even without the Arctic Blast this weekend, it's still to early.
People get so hyped up to plant tomatoes, squash, peppers, and beans around now, but it's too darn cold. My anecdotal observations from having spent a lot of time working outdoors the past ten years is that spring is cold for longer than you expect and fall is warm for longer than you expect. I always think of May as a very warm month, but it's just not. And I think of September as chilly weather for long sleeves, but there were 80 and 90 degree days last September. So when to plant tomatoes? (And all the rest of that warm stuff) No earlier than May 15th. Memorial Day weekend is the classic time to plant tomatoes and I agree. I've planted them May 15th before, and they just sit there in the dirt until late May when they take off and grow rampantly. So it's kind of pointless to put them in May 15th, in my opinion. And when is it too late? I took home some stragglers from Natureworks and planted them in probably the third week of June. Didn't get any tomatoes, but that's because they were long-maturing varieties. If I had put in a quick-maturing 60 day tomato at that time, I think it would have been fine. So I would say you can plant tomatoes all through the first few weeks of June, but as it gets later, be careful about the variety you plant--make sure it matures quickly. Today was my first full day working from home. I thought it would be great--sweatpants all day, lots of time to think and do things on my schedule. Man. I feel delirious, can't focus anymore, and my relationship to food really changed. Truly eating out of boredom and distraction.
The fact that it's a brand new job (like, second day) probably makes it a little harder. But I understand why so many people are going for walks. I have to get outside now. Good thing I have a huge wood chip pile to move. 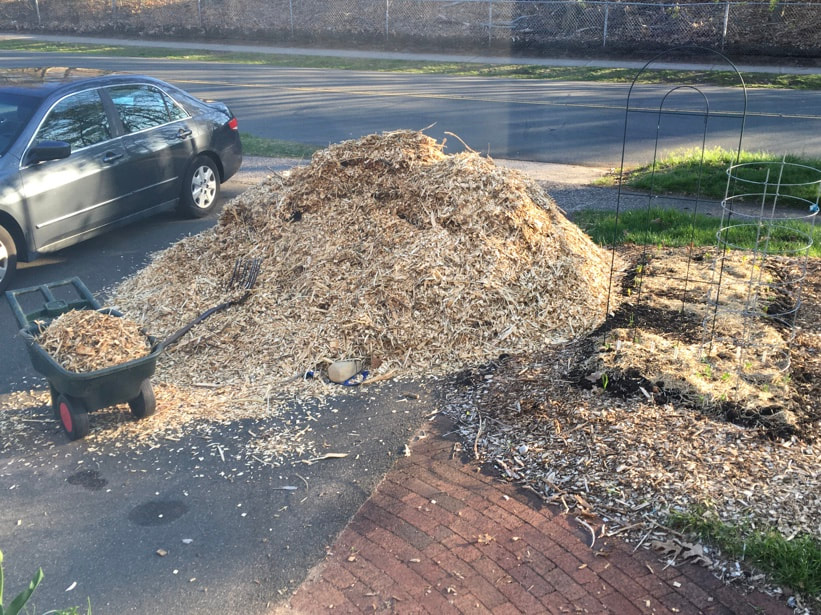 I swore that we would never again get free wood chips. I would pay to have the amount I wanted delivered. No more giant wood chip piles in the front yard. Well, these were free. They were Adam's idea and he is being Very Nice to me because he knows this is more than I want. He is also moving them all. He was out until dark this evening. He's doing a mushroom project, growing three different kinds of oysters and a winecap, and he needed fresh hardwood. He's going to do a guest post here at some point because I don’t know what he’s doing. 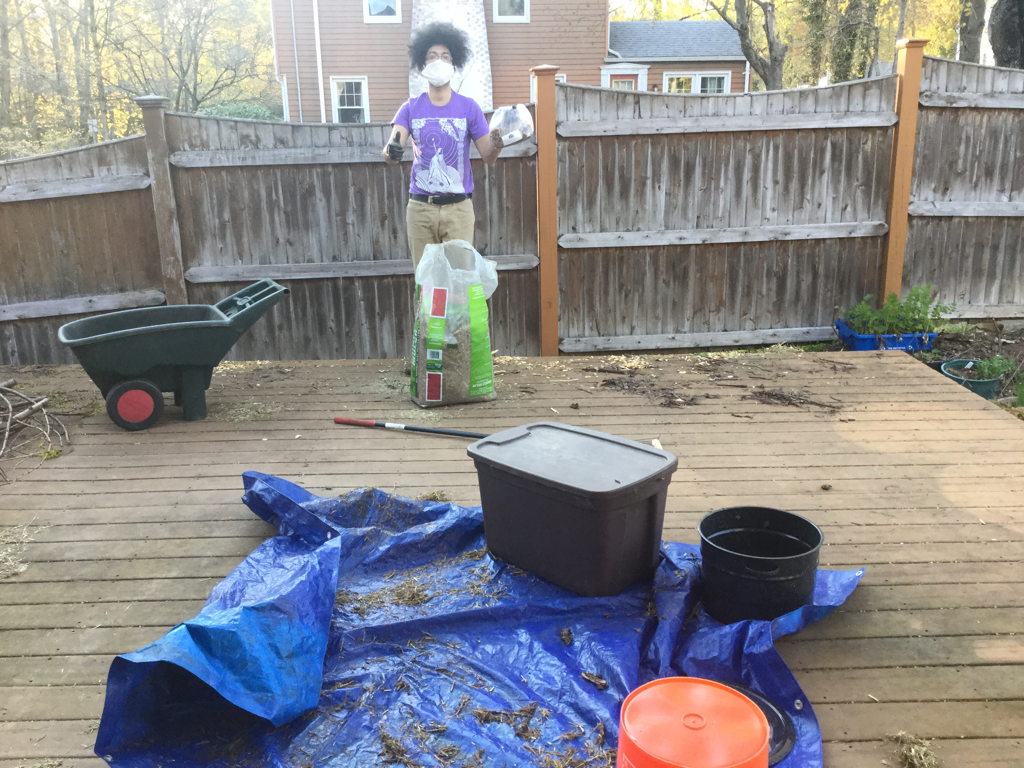 I don’t know what he’s doing. It’s going to be very cool because we will have culinary mushrooms enriching the soil and creating diverse habitat.
Still, I can't believe we have wood chips again. We’ve got invasive jumping worms in our yard. They are voracious eaters who strip the soil of nutrients, therefore damaging surrounding plants. There are a few ways to identify them, mainly from the smooth band near their head and the distinctive way they move. They writhe faster than any other worm, usually in an ‘S’ shape, flipping back and forth. They live on the soil surface, which is another way to identify them. I discovered them in the wood chip pile when it was delivered, but I can’t figure out whether they were here already or somehow came with the wood chips. Either way, they’re here and we’ve got to figure out what to do. Most people say that there’s no way to get rid of them. Picking them out and killing them doesn’t work; they lay huge amounts of eggs so they always replenish themselves. Animals won’t eat them because it’s suspected that they retain metals. When I find them, I put in them in a jar of water to drown, and it takes DAYS. Last year, the manager at Natureworks applied a bunch of biochar to a vegetable bed that had the worms, and by fall there were none. This spring, as I spread biochar on areas where I saw baby jumping worms, I decided to try a controlled environment. The first image is pure biochar. It killed the worm very quickly. The second image is a small amount of biochar mixed with soil, which also killed the worms. Sorry the pictures are gross and sorry the experiment is gruesome, but I had to know. The lingering question I have about biochar is: what effect does it have on other life forms? Maybe other worms live deep enough below the soil surface, but what about the robins who pick at the soil? Also, in a large area, I don’t know whether you need to apply biochar to the whole area or simply the places you see worms. So far I have only done places where I’ve seen the worms. 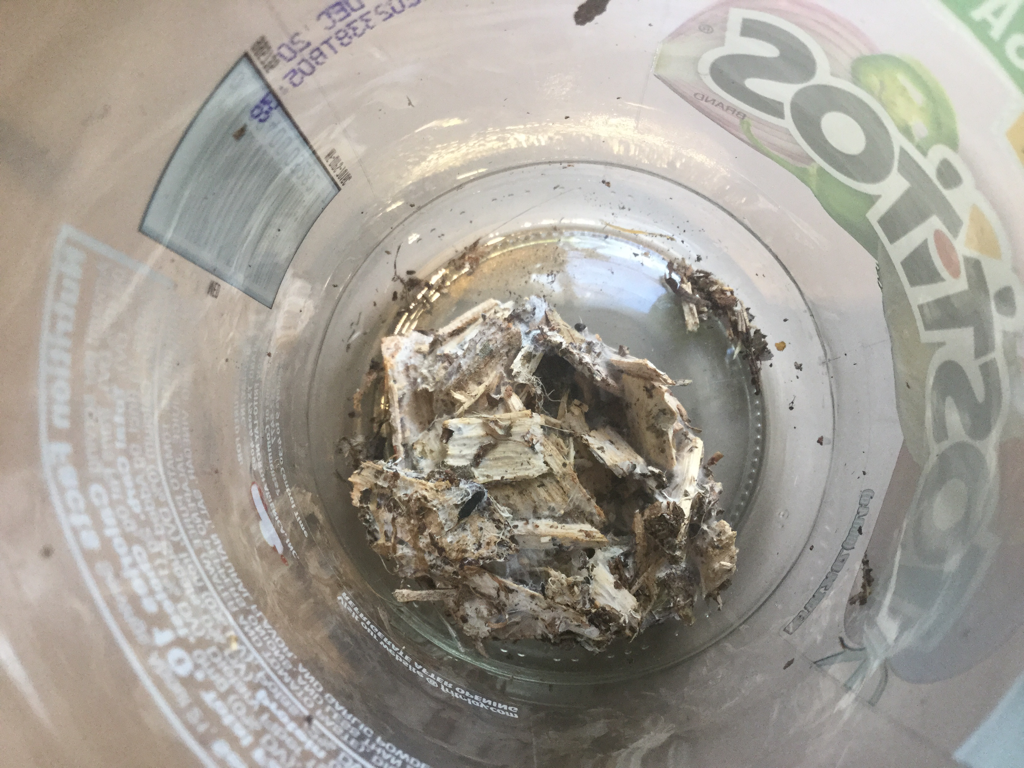 I also noticed that jumping worms were not living in areas with heavy mycelium. (Fungal growth that appears on wood chips). The worms I put in the jar with this mycelium also died, though not as quickly.
One other environment where I witnessed an absence of jumping worms was place I’d smothered with cardboard with wood chips on top in the fall. In one such area I had seen a jumping worm last fall, and I kept expecting to see them in the spring. None so far. I think the cardboard pressed tightly to the ground deters them. I also do not see them in the grass. So it seems that these worms’ favorite environment is open, disturbed soil with some organic matter available, such as leaves, wood chips, or straw. An area smothered heavily with cardboard does not seem to support them. I feel better having discovered a few ways to deter them from a location, though there seems to be no perfect silver bullet. The whole gardening year lies ahead of us and it’s really getting cranking! The soil is warm enough for many types of seeds and transplants.
A note on transplanting seedlings vs. planting seeds: The case for transplanting vegetable seedlings as opposed to planting seeds directly in the garden was made best in the book The Market Gardener: seeds take up valuable garden space while they grow. If you plant already-growing plants, you’ll maximize your garden production space. If you have indoor growing space, you can start these seeds in cell trays indoors. If you don’t, buy seedlings from a nursery. (Professional growers really know what they are doing, so you’re going to get the best results from professionally grown seedlings.) Some things are just better planted as seeds—root crops like carrots, parsnips, and radish don’t love transplanting. You can plant both seeds and seedlings at the same time, by sprinkling seeds around the transplants. A great example of this is lettuce; a week or so after you plant lettuce seedlings, sprinkle 10 lettuce, arugula, or radish seeds around them. The lettuce will get harvested and new ones will be growing in its place. What you can plant now, in mid to late April Our last frost date is coming up; optimistic sources suggest it’s late April. Conservative sources say it’s May 15th. It will likely be somewhere between those two. There’s really no need to rush it and plant tender seeds like beans and cucumbers. Even if our last frost is genuinely in late April, the soil will likely be too cold for warm-season vegetables and the seeds will rot. So enjoy the season. No need to rush it. Indoors in cell trays The only things you’re going to be planting indoors in pots now are warm season transplants, such as:
Seeds you can plant directly in the ground
If you bought them, or grew them yourself and they have their first true leaves.
Let’s be honest—it was my first time planting any fruit trees for the first time. I ordered three apples, one peach, and one bush cherry from Fedco Trees, all bare root. Here are my thoughts:
Other thoughts on my experience—it was very exciting getting them. You can’t really get a good look at them in the package because their roots need to stay moist and bundled in their wet newspaper. So when I went in to get the first tree after Adam and I had dug the hole for it, I had the distinct feeling that I was going in to wake my baby up from a nap. But I had never met my baby before. Fun anticipation. Then I planted the trees too high. All of my horticultural education has harped on the dangers of planting trees too low. I planted them so the graft (the nubby bit on the stem) was eight inches above the ground. Later I realized it’s supposed to be 2-3 inches. So we replanted two of the trees and added soil to the bases of two others. I also packed the dirt too tightly around the roots by walking on it after planting. I thought you had to do that to eliminate air pockets around the roots, but I think I overdid it. In our sandy soil that is not a problem (though I did go out later and used a garden fork to loosen the soil) but if your soil was clay or loam, walking around them as much as I did may have compacted the soil. Let’s talk pruning. I’m following Anne Ralph’s Grow a Little Fruit Tree method, so the initial pruning is crucial. And It is extreme. You prune to knee high, and no more than 24 inches tall. Branches will grow out of the dormant buds on the stem. Fruit bearing will be delayed by such a dramatic cut, but it will result in a tree that is much easier to maintain. Here’s what my trees looked like when I got them, versus what they looked like when I was finished. It took me two hours to muster the courage to cut them back this hard. But she says that fruit trees are vigorous and most people wish they had trimmed theirs back harder upon first receiving them. All this is to say that if you have the desire to plant a fruit tree, you should do it! You might make some mistakes, like I did, but there’s nothing un-correctable.
|
Categories
All
Archives
August 2021
|
 RSS Feed