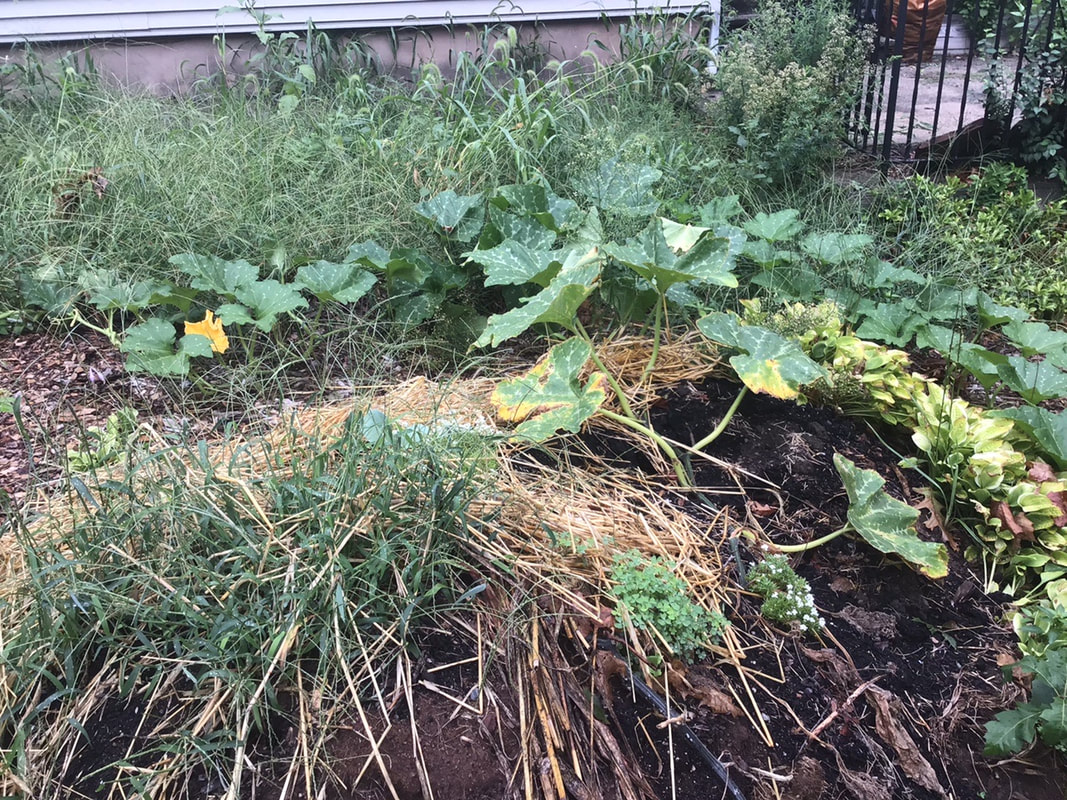
 By: Adam Hamden CT, where we live, has been hit with two fairly major storm events over the last three weeks, both causing massive tree damage and power outages in Hamden and nearby towns. With the town in a budget crisis, any leaf and branch debris that wasn’t immediately connected to a power restoration effort has laid there since falling. The question of the town’s responsibilities and priorities, especially with regards to tree planting, pruning, and care, looms over this question, but I won’t get into it here. In a better world we would have less tree damage, because municipalities would see the long term value of maintaining a healthy tree population for the functions of wind breaking, aesthetics, cooling in the summer, food production, any number of other climate related side effects. I think how much money it would cost to hire tree crews before a storm to remove damaged limbs, rather than having the entire staff of a utility company working overtime in damage control mode after all those branches have fallen. That’s the better world. We’ll get there. But in the meantime, we have branches. We have logs. We have twigs, seed pods of various sorts, and I see a fair share more branches that will almost certainly come down in a storm or two. What are we going to do with it all? If you garden, and are in a space somewhat long term, there is an answer - Hugelkultur. Hugelkultur is a technique with an element of mystery to it. Looking at a finished hugelkultur, with earth mounded up in a hill, it looks almost ritualistic - but you can install walls or barriers of a sort to give a more organized look. There are a few variations in design, but the basic process is - you dig into the ground and smother, or simply lay cardboard on top of the ground. 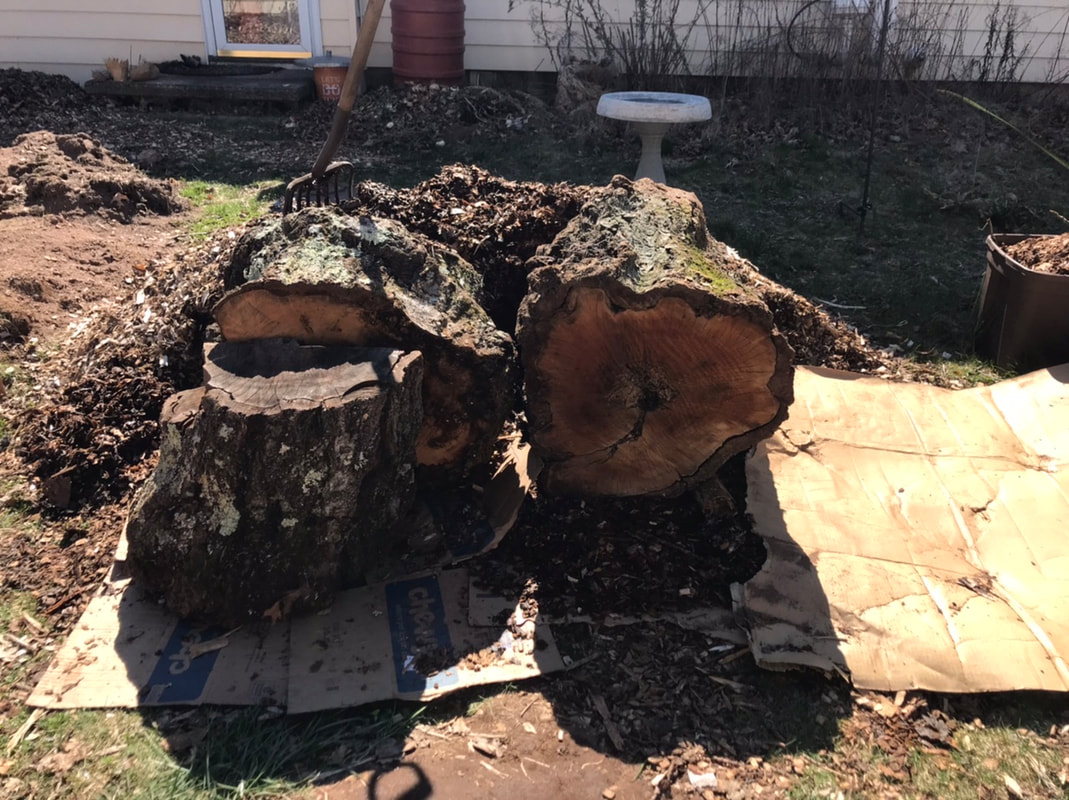 We actually moved these logs closer together after taking this photo - and jammed a bunch of smaller sticks and dirt in the gap at the bottom. You then position logs - any kind of dead, untreated wood - at the bottom. If your logs are large, you should probably dig 6-12 inches into the ground - something we should have done here! 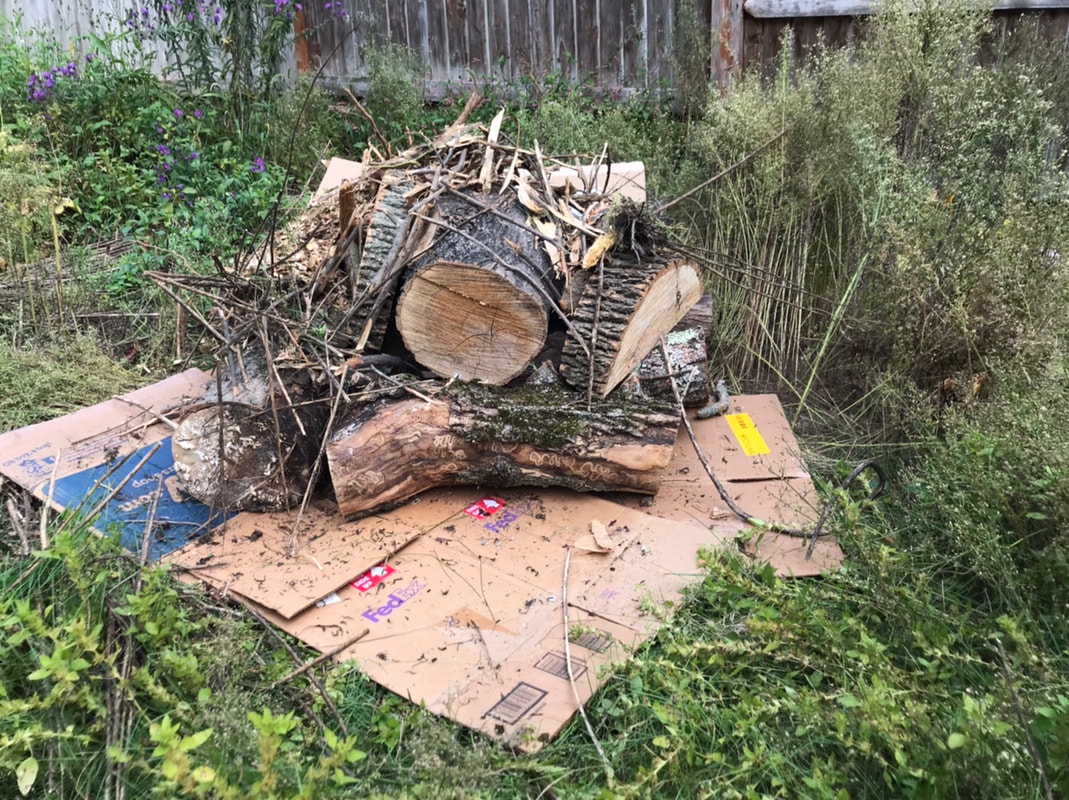 On top you’re going to add some smaller organic material - smaller branches, leaves and twigs, fresh wood chips, shredded leaf matter. 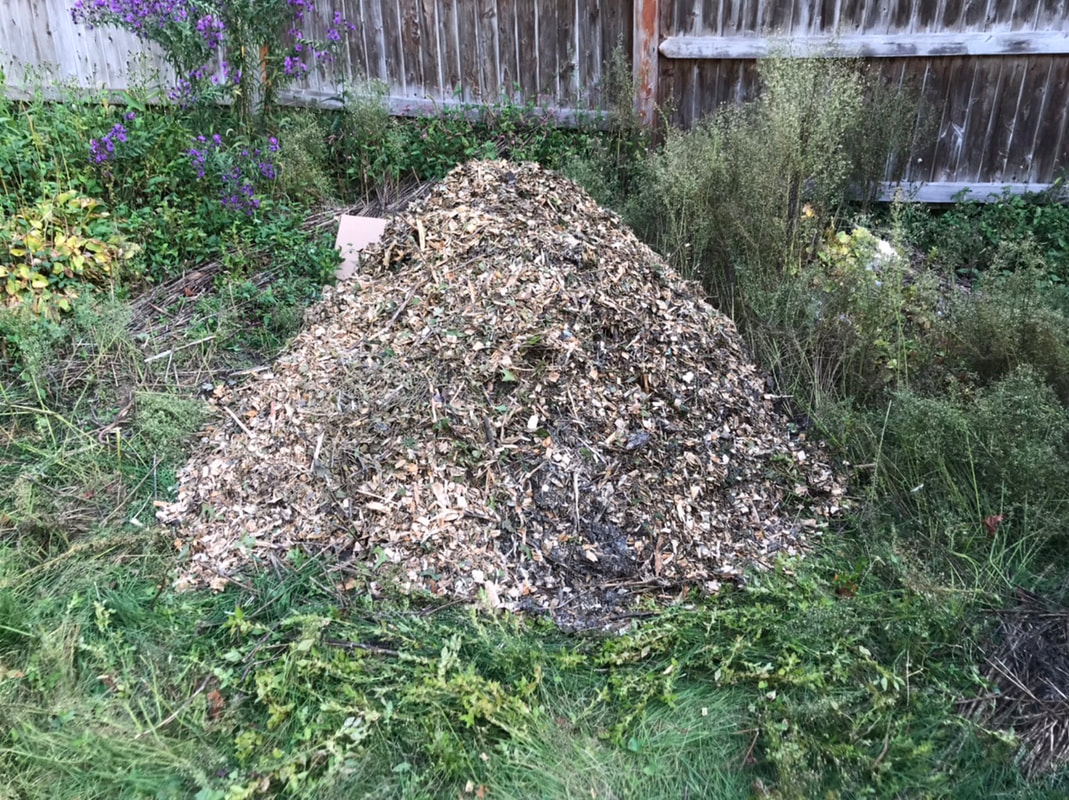 Eventually you’ll top the whole thing with finished compost and top soil. 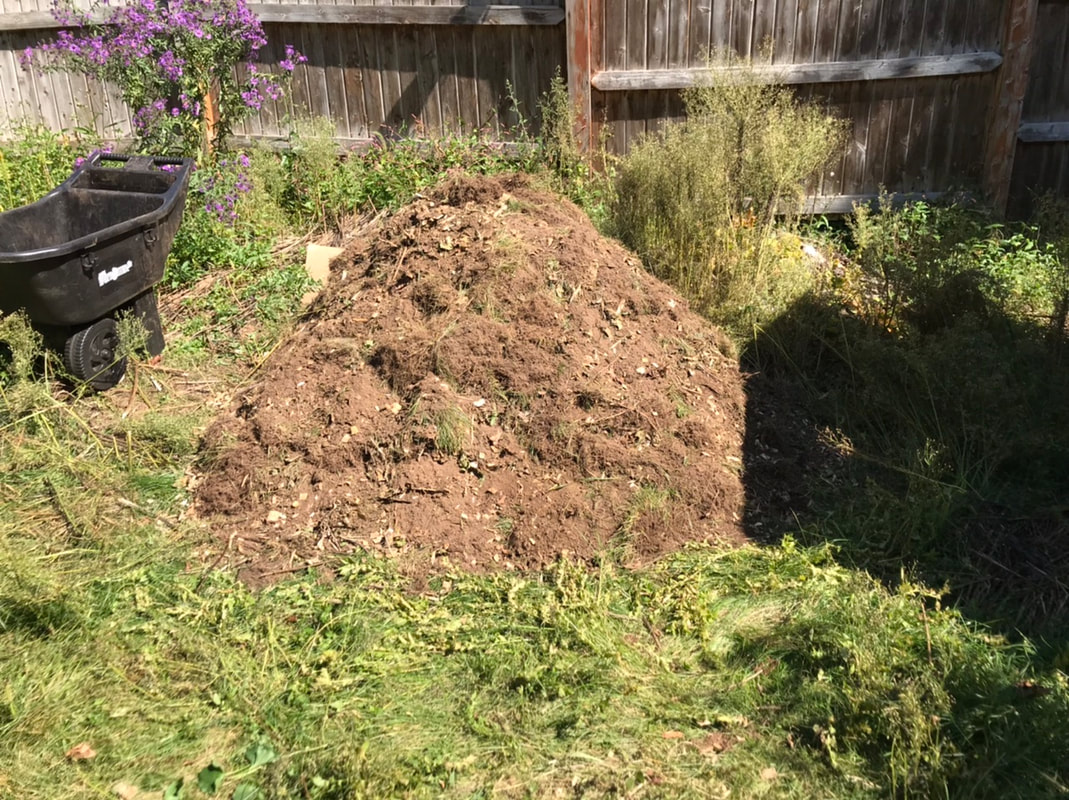 As you build your mound, you want to stack your wood and organic matter in such a way that there are no substantial air pockets - so it helps to add in layers of topsoil as you build to ensure that there’s a place for roots to go, and no place for small critters. Our first mounds had some noticeable mouse or chipmunk-sized holes, and in some places plants weren’t as successful due to encountering layers of leaves or woodchips without any further possible soil to dig their roots into. A good rule of thumb for a project that involves moving a lot of earth is to make sure to stack that soil on a piece of cardboard or a tarp, so that when you’re topping your mound with it at the end of the process you can just sort of pour it on from the cardboard or tarp. -Make sure you have several inches of soil on top before you reach any of the other organic matter. And plant in it or mulch it immediately to help protect against erosion. -If you’re using leaves, make sure to shred or crumble them. Whole leaves can form an anaerobic layer when wet and clumped together, and this will be near impossible for young plant roots to penetrate, in addition to inhibiting decomposition. 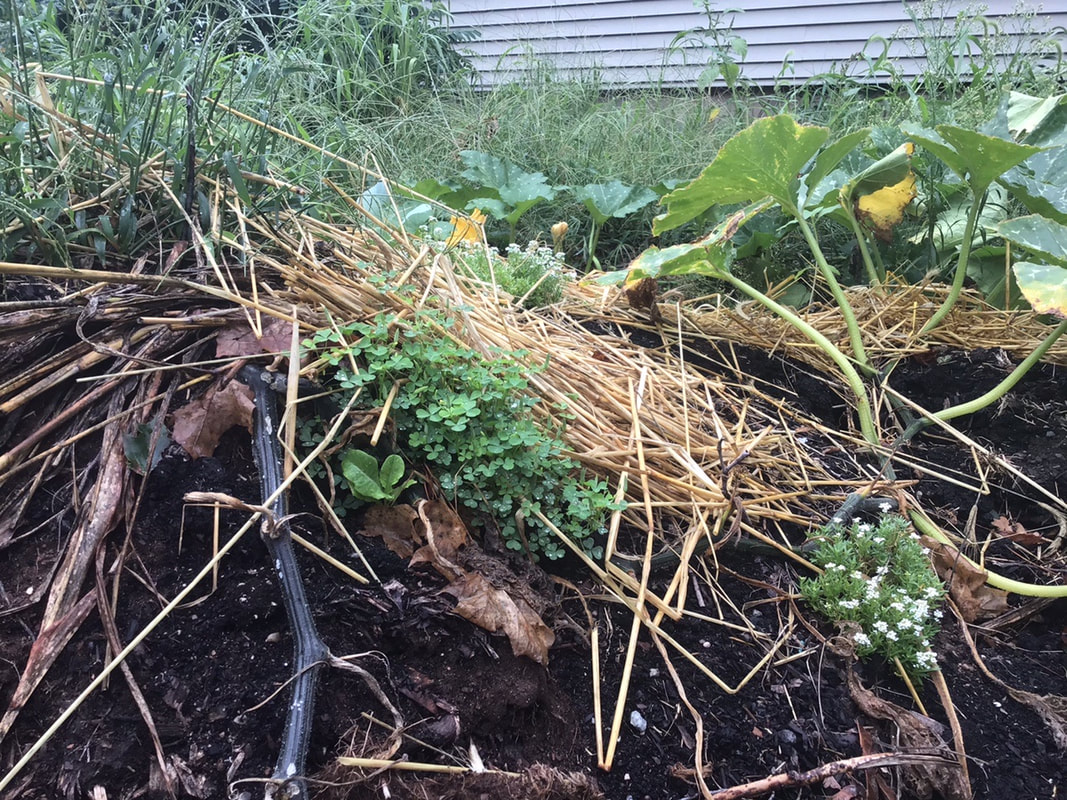 The idea is that as this wood breaks down, it can serve as a reservoir of water for the plants growing on top, and the decomposition process underneath can lengthen your growing season by a week or two on either side of it. As the decomposition of the logs continues, the mound will sink a bit - and the rotted wood will enrich the soil. Planting and watering on a mound initially can be a bit challenging, and if we could start again, I would dig everything into the ground another few inches to lower the overall height of the mound. This would allow more of the soil to be closer to the top, giving plants placed on top and side more soil space for their roots to take hold. The downside is that this requires some long term planning. Much has been made about the ability of newly rotting wood to steal nitrogen from the soil. It is true that as wood initially begins to decompose, it requires a large amount of nitrogen. But we set up Hugelkultur mounds in the fall of last year, and were able to plant rye as a cover crop on them for the winter. This spring we planted some annual vegetables with varying degrees of success, but some of the most successful were heavy nitrogen feeders like squash - so we’ve seen the point now at which these mounds have started to become more productive. Some of the case studies we’ve seen of these mounds at 3 and 5 years show enormous crops of volunteer vegetables, with minimal watering requirements, and of course enormous benefit to the vitality of the soil. This year we’ll do a more standard cover crop mix of peas and oats, which is a winter kill crop. 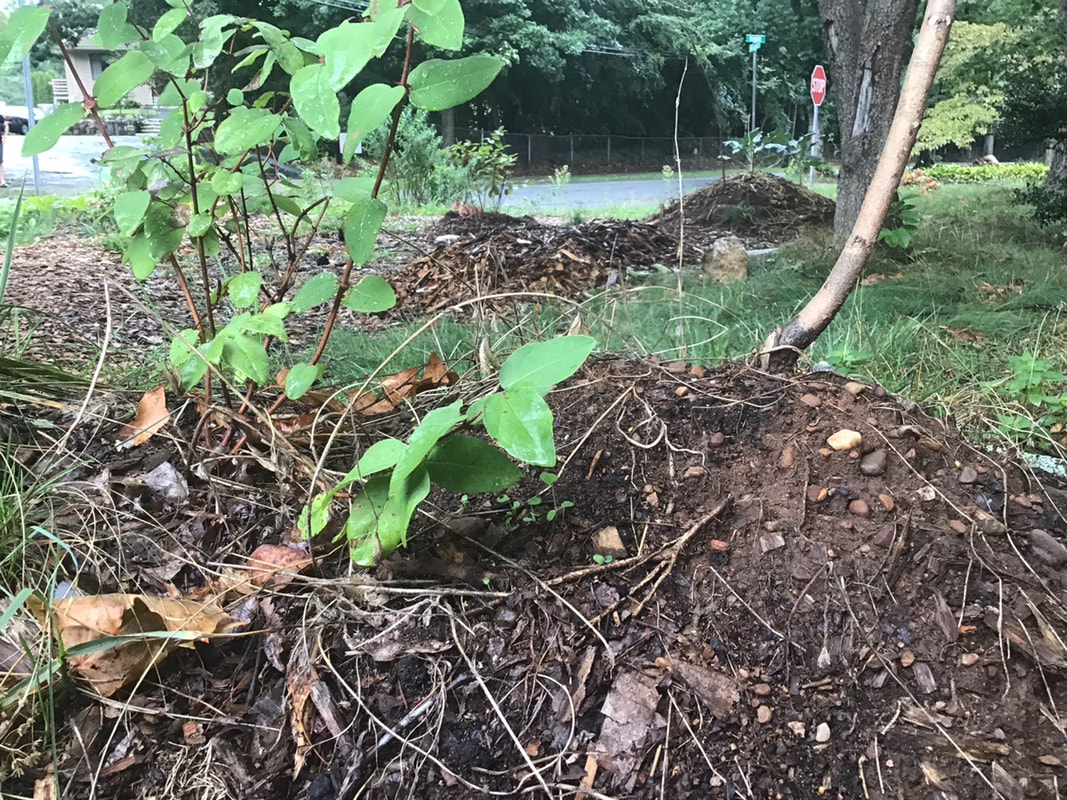 We also planted this pair of honeyberry shrubs, a perennial, on sort of mini-hugel mounds - soil on buried woodchips that had rye on it during the winter, and they’ve required very minimal watering during the drought this summer. We have two smaller mounds in our front yard, and several more larger ones in our back. This was a design choice based in some way on fear of judgement - there is something kind of ritualistic to the look of these mounds. I know that if I saw one in the opening scenes of a horror film, I would assume I was going to learn some mystical and unsettling secret about it before the credits rolled. It’s not the right feature for every space - but if it is space where you are already going to garden, and you have the benefit of a few months to a half a year of lead time, and a relative certainty you’ll be tending in that space for a few years, the benefits seem clear.
The storms have created an abundance of dead and scrap wood. Do we view it as a nuisance? Or do we view it as a resource?
1 Comment
Diane Hoffman
8/29/2020 07:19:29 pm
VERY interesting! thanks ; - ) Leave a Reply. |
Categories
All
Archives
August 2021
|
 RSS Feed